A hydrometer measures the specific gravity of liquids. It looks at the ratio of the density of the liquid it is placed in compared to the density of water. They are usually made of a glass cylindrical stem adjoined to a weighted bulb which floats when placed in solution. By carefully placing your hydrometer in a sample of your solution you can take the measurement on the scale where it breaches the surface. A brineometer works in exactly the same way but is specifically made to gauge the strength of a salt solution with the stem incremented from 1-100% saturation.
In low-density liquids such as gasoline and alcohol you would expect the hydrometer to sink deeper, whilst high density liquids such as brine and milk it will float higher. You can get units that are therefore made to measure particular substances such as a brineometer to measure brine or one specifically made for measuring petroleum. These can have a scale that focuses with greater accuracy on the expected density range.
We have made a quick overview video below:
A guide to using a hydrometer and what to take into account:
Suitable Container
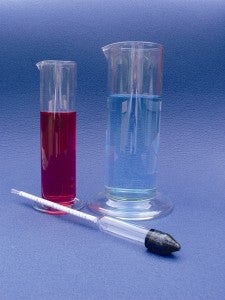
Before you start you need to make sure you have a container long enough to fit your hydrometer, especially if you have a low-density liquid which will cause your unit to sink deep – you can’t have your unit touching the bottom or the sides as it will ruin your measurement taking! You can use any clean container, however we recommended using a hydrometer jar – a tall round jar which ensures correct diameter to eliminate edge effects from surface tension, but narrow enough to not have to use too much of your sample.
Temperature
Each hydrometer will be classified to test the density whilst placed in a particular temperature – most at room temperature. If your liquid is not at that specific temperature, make sure you allow it to reach this level before testing as this will alter the accuracy of your readings. It is advised to take a temperature reading both before and after using a hydrometer and to make sure the temperature is stable, if you are unable to do this your reading will need to have a correction due to temperature applied.
Bubbles!
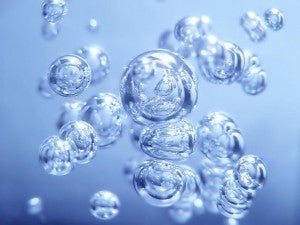
Pour your liquid sample slowly and carefully down the side of the jar and stir the liquid gently to avoid the formation of air bubbles. These will move the position of your hydrometer and alter measurements.
Handling
The hydrometer should only be held by the stem if it is being held vertically. When doing so make sure you hold it by the top as finger marks lower down can affect the accuracy.
Taking the Reading
Hold the hydrometer at the top of the stem and lower it into the liquid, release when it is approximately at its position of equilibrium. Note the approximate level it breaches the water and then pressing the top of the stem push the unit into the liquid a few millimetres passed equilibrium. Don’t grip the stem but allow it to rest slightly between finger and thumb. Release the hydrometer and it should rise steady and settle down to it’s position of equilibrium. Take this point as your reading.
Correct Scale Reading
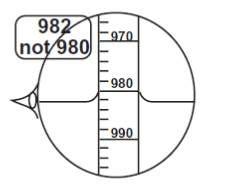
The correct scale reading is that corresponding to the plane of intersection of the horizontal liquid surface and the stem – NOT the point where the line of liquid actually touches the hydrometer stem. You must take the reading viewing the scale through the liquid. This is demonstrated in the below image – the correct reading is 982 not 980!
Be careful
If the meniscus is crinkled or dragged out of shape by the motion of the hydrometer it indicates either the hydrometer of the surface of the liquid is not clean. Carefully clean the hydrometer stem and remove any impurities on the surface on the sample.
If you have any further questions about taking a measurement with a hydrometer, you want to find a hydrometer that’s best suited to your application or applies to a specific certification give us a ring on 01954 233 120 or send us an email on support@camlab.co.uk.
-
 Brinometer 0 to 100% brine (%) Length 230mm
£16.07
excl. VAT
£19.28
inc. VAT
-

-

-

-

-

-